Installing Development Tools
Julia REPL
A REPL, or read-eval-print loop, represents a language "shell" or program that allows the user to communicate with the programming language interactively with immediate feedback. This allows for exploring the language more deeply than via a script, with rapid prototyping being much quicker and easier to perform.
The Julia REPL is included by default in every Julia installation and boasts a number of features to the point that it alone can almost be considered a proper IDE. It should appear the moment you enter julia into your terminal:
   _       _ _(_)_     |  Documentation: https://docs.julialang.org
  (_)     | (_) (_)    |
   _ _   _| |_  __ _   |  Type "?" for help, "]?" for Pkg help.
  | | | | | | |/ _` |  |
  | | |_| | | | (_| |  |  Version 1.9.2 (2023-07-05)
 _/ |\__'_|_|_|\__'_|  |  Official https://julialang.org/ release
|__/                   |

julia>
Not every feature that the REPL provides will be shown, however here is a quick list that most Julia users should know to make the most of this shell:
- There are 5 Julia REPL modes that serve separate purposes:
The Julian (default) mode wherein one can write, load, and test out code
Help mode for printing documentation for functions, keywords, etc.
Pkg mode for working with the included package manager and manipulating dependencies/packages
Shell mode to execute system commands (run a terminal from Julia which itself is running from a terminal!)
Search modes (forward, reverse) to look through your history of inputs
| Prompt | Key binding |
|---|---|
julia> | None (default mode) |
help?> | ? or ?? (extended help) |
(@v1.x) pkg> | ] |
shell> | ; |
(reverse-i-search): | ^R |
(forward-i-search): | ^S |
If you have a code editor installed on your development machine, you can go back and forth between the Julia session and the editor by entering
julia> edit("<name of file>"). You can jump right back into the Julia session once you're finished!You can get a list of matches to a partially written word by entering the TAB key, which also serves to render an Unicode symbol in the REPL (full list available in the Unicode Input section of the Julia manual):
juliajulia> pri[TAB] primitive type print println printstyled julia> \pi[TAB] # renders πYou can run a standalone script by entering
include("<name of script>")in Julian mode. For greater control, the equivalent of Python3'sif __name__ == __main__condition would beif abspath(<name of program file>) == @__FILE__
Warning
One common gotcha with the Julia REPL is that there are currently certain code changes that cannot be performed without restarting your session, such as redefining structs (see the example below). You can mitigate this by adding the Revise package, although restarting the session is the simplest option.
julia> struct Point
        x::Int
        y::Int
       end

julia> struct Point
        x::Int
        z::Int
       end
ERROR: invalid redefinition of constant Point
Stacktrace:
[1] top-level scope
@ REPL[2]:1
To learn more, see the The Julia REPL section in the Julia manual.
Visual Studio Code extension
The Julia organization officially supports the julia-vscode extension which, together with VSCode, provides a complete solution for developing in Julia similar to a fully integrated development environment (IDE). This boasts a number of advantages compared to a pure REPL-driven solution:
Built-in syntax highlighting and code completion
GUI interaction for managing options and commands
Advanced profiling/debugging features
Additional extensions support
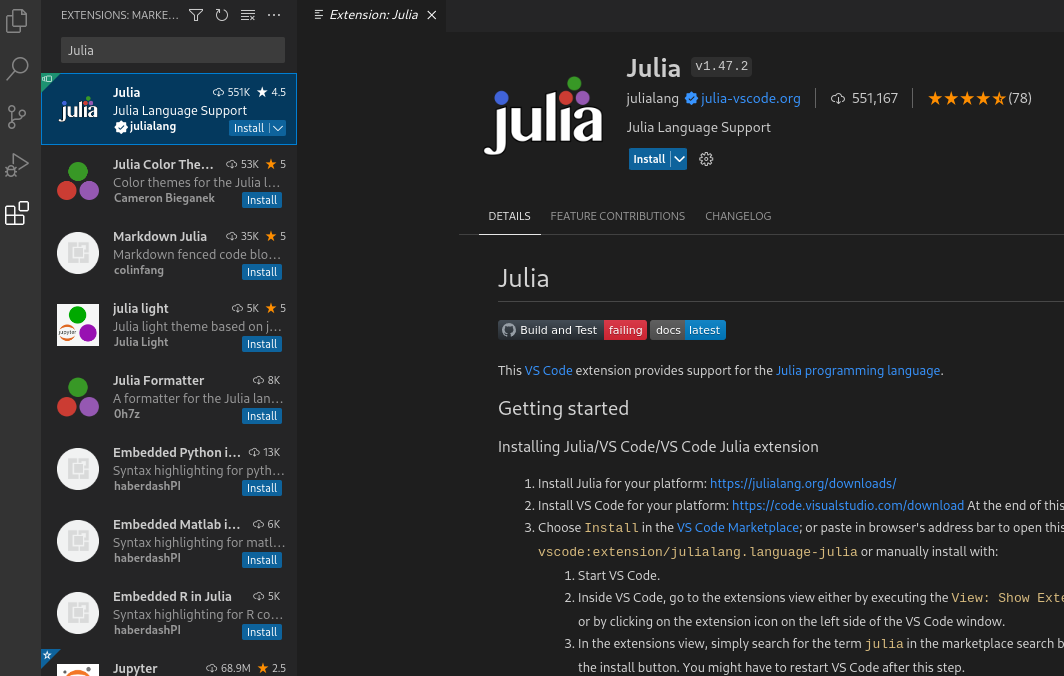
To install vscode, follow the instructions on how to install the official binary for your development machine from the official website. Next, click on the Extension icon in the side Activity Bar and search for "Julia". The official Julia extension should be the first extension available. You can also install Julia within the Quick Open input panel by pressing Ctrl + P and entering ext install julialang.language-julia.
Install the extension and restart vscode. We also recommend installing some additional extensions that will further improve the development experience:
Even Better TOML (
ext install tamasfe.even-better-toml) for working with the package TOML files (Project.toml, Manifest.toml, Artifacts.toml,...)GitLens (
ext install eamodio.gitlens) for enhancing Git workflows
You can experiment with Julia extension features in the Quick Open panel by writing Julia and consulting the available options. To learn more, visit the Julia in Visual Studio Code page or the Julia extension's official website.
Alternative Editor/IDE extensions
Although julia-vscode is the only officially supported extension, community extensions are available for a range of code editors/IDEs:
julia-emacs that integrates a new major mode for developing in Julia
julia-vim to enable Julia support for Vim/Neovim
julia-sublime to enable Julia support for Sublime
Certain editors/IDEs, such as GodBolt and Replit, already support Julia without extensions. Finally, many editors, like micro, natively include support for basic features such as code highlighting or simple autocomplete.
Notebooks
A reactive notebook is an interactive environment that combines elements of a code editor and a REPL into one solution. One writes code in executable blocks of "cells" that can be mixed with text and other assets to create a reproducible document that is shareable and easily manipulable. Notebooks are especially useful for scientific exploration since code can be rapidly prototyped in an isolated environment that can be both visualized and documented in the same file.
There are two standard methods for working with Julia in notebooks:
IJulia (Julia kernel for Jupyter)
The Julia organization officially supports the IJulia kernel, or backend, for Jupyter notebooks, which is the most popular web-based notebook solution.
To install IJulia/Jupyter and run the notebook server:
Note
Instead of loading Pkg, one can simply activate pkg mode with the ] key and enter (@v1.9) pkg> add <package name here>
Install Julia via any method mentioned in the Installing Julia section
Open the Julia REPL by entering
juliainto your terminalAdd the IJulia package via the built-in package manager:
julia> using Pkg;Pkg.add("IJulia")Load IJulia and launch the notebook server:
julia> using IJulia; notebook()(runnotebook(detached=true)if you wish that the notebook, andnotebook(dir="/some/path")if you wish to open a notebook in a ) server sruns in the background even if the Julia session is closed)Enter
yto install Jupyter via Conda if you have not done so already on your machine
The notebook dashboard should open within your web browser. If you already have jupyter installed (Installing Jupyter), you can enter n when prompted by the Julia REPL and instead run jupyter notebook from the terminal. Visit the Running IJulia section in the official IJulia docs for more information.
Pluto notebooks
Pluto.jl is an alternative notebook solution built with Julia in mind. It integrates well with the language and boasts a number of features that are not available or are difficult to achieve with the Jupyter solution:
Works with Julia's built-in package manager for native reproducibility
Live docs feature, essentially Julia's help mode available within the notebook
Works with normal Julia (.jl) files as opposed to .ipynb files
To install and run the Pluto server:
Install Julia via any method mentioned in the Installing Julia section
Open the Julia REPL by entering
juliainto your terminalAdd the Pluto package via the built-in package manager:
julia> using Pkg;Pkg.add("Pluto")Load Pluto and launch the notebook server:
julia> using Pluto; Pluto.run()Copy/paste the given URL (http://localhost:...) into your web browser
A number of featured notebooks are available online that include basic tutorials and powerful demonstrations achieved with Pluto.